Pre-requisites
- Zapier Account: You need an account on Zapier. More information about their subscription plans can be found here.
- Edda Access: You must be an Administrator or Moderator user on Edda.
This guide will focus on three main uses of this integration: notifications, data submission to Edda through web-forms, and importing multiple companies from files.
Connect Edda with Zapier
You will first want to make sure that Zapier can access your Edda account by following these steps:
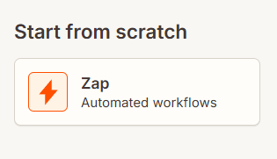
- Open Zapier using your browser and click on ‘Zap’ under the ‘Start from scratch’ section:
- Click on Trigger and in the new pop-up search for ‘Edda’ to connect it to Zapier:
.png?width=610&height=557&name=image%20(1).png)
- Under ‘Trigger event’ find the appropriate trigger for your particular workflow. This will be the action that triggers your Zap. You can select one from the dropdown as shown below:
.png?width=670&height=516&name=image%20(2).png)
- Once you have the trigger selected, make sure to connect your Edda Workspace with Zapier via the ‘Account’ dropdown:
-1.png?width=670&height=294&name=image%20(3)-1.png)
- Your Edda account is now connected to Zapier!
You can use Edda as an Action in your Zaps by connecting it in the exact same manner as with Triggers.
You can reference a couple of our examples below to build Zaps that will best automate your daily operations:
Create a new company using Google Docs
Create a new Zap
1. Log in to your Zapier account.
2. Click on ‘Zap’ under the ‘Start from scratch’ section.
Trigger
1. Select ‘Trigger’ to start an event that will trigger the Zap.
2. Type 'Google Docs' in the search bar and select it.
3. For the trigger event, please select 'Updated Document' for this example.
4. Select your document in the 'Configure' tab..png?width=670&height=401&name=image%20(1).png)
5. Please make sure to test your trigger, and once the test passes you can move on to configure the Action by clicking 'Continue with selected record'..png?width=670&height=402&name=image%20(2).png)
Action
1. For the Action, please select 'Edda' via the search bar.
2. The action event we will use in this example will be 'Create a new company in the specified pipeline', but other options like 'Create a new company in the specified stage' will work for you as well.
3. In 'Configure', please add your workspace and pipeline, and then scroll a bit down to the 'Version 3' dropdown menu. There, you'll want to map the field fromyour document where the name of the company is with the name that Zapier will add to the newly created company for you..png?width=670&height=393&name=image%20(3).png)
As for the source, please select 'Import'.
4. Now, all that's left to do is to test the Action.
5. And, once the test passes, please feel free to 'Publish'..png?width=670&height=410&name=image%20(4).png)
Notifications
In this example, we’ll use Zapier to automatically send a notification to Slack every time a company is moved to another stage in Edda.Create a new Zap
1. Log in to your Zapier account.2. Once again, click on ‘Zap’ under the ‘Start from scratch’ section.
Trigger
1. Select ‘Trigger’ to start an event that will trigger the Zap.2. Type 'Edda' in the search bar and select it.
3. In the App & Event section, pick the desired event (e.g., ‘Company moved’) and select ‘Continue’.
4. Select your workspace in Edda and choose ‘Continue’.
5. Trigger a test to show the last company movement data. If no movement has been made, no data will be present.
6. Select ‘Continue with the selected data’ to proceed to the action setup.
Action
1. Select an app for the action (e.g., ‘Slack’ to send a notification).2. In the App & Events section, choose ‘Send Channel Message’.
3. Account: Log in to your Slack account to authenticate.
4. Configure the action settings:
• Select the correct Slack channel.
• Add the message text and select the data points (e.g., ‘Company Name’, ‘Previous column name’, ‘Next column name’).
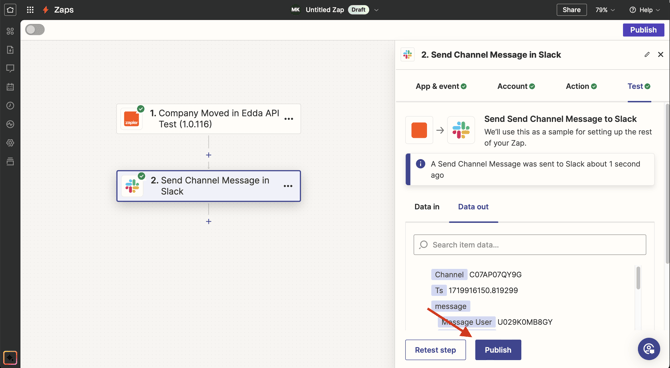
5. After customizing, click ‘Continue’ and then ‘Test step’ to receive a message.
6. Select 'Publish' to make this Zap live. Every time a company is moved in Edda, a Slack message will be sent.
Create a new task
Here we have a Zap that will create a new task in Edda once a new company is created:
Create New Zap
1. Log in to your Zapier account.2. Click on ‘Zap’ under the ‘Start from scratch’ section.
Trigger
1. Select ‘Trigger’ to start an event.
2. You will once again want to add Edda as the trigger, and in this example we can use 'Company Created'.-1.png?width=670&height=438&name=image%20(4)-1.png)
3. In the next step you will want to specify the Workspace:-2.png?width=670&height=446&name=image%20(5)-2.png)
4. And finally you'll be asked to test the Trigger:.png?width=670&height=444&name=image%20(6).png)
Multi-step
1. Now, this Zap needs a step between the Trigger and the Action in order to work. This is because we need to fetch existing tasks first to create a new one in the end.
You can configure this additional step as shown below:.png?width=670&height=446&name=image%20(7).png)
.png?width=670&height=446&name=image%20(8).png)
2. For the test, we will need only the first search result. This is because we only need to grab a task ID, to later add it to the Action..png?width=670&height=450&name=image%20(9).png)
Action
1. Please choose 'Create a new task' for the action..png?width=670&height=440&name=image%20(10).png)
2. For the purposes of our mockup Zap here, we used a test Task ID and no other parameters. But, of course, you can add a schedule date and assign specific users to this task:
.png?width=670&height=447&name=image%20(11).png)
3. Once the Action has been tested, you'll be ready to publish the Zap!
.png?width=670&height=442&name=image%20(12).png)
Data Submission / External Sheets to Create a Company Event on Edda
In this example, we’ll focus on importing information from Google Sheets to Edda.
Create New Zap
1. Log in to your Zapier account.2. Click on ‘Zap’ under the ‘Start from scratch’ section.
Trigger
1. Select ‘Trigger’ to start an event.2. Type “Google Sheets” in the search bar and select it.
3. Choose ‘New or Updated Spreadsheet Row’ as the event and select ‘Continue’.
4. Log in to your Google account to authorize Zapier to read the data.
5. Select the file and worksheet in Google Sheets for validation.
6. Trigger a test to show the last data made in the sheet.
7. Select ‘Continue with the selected data’ to proceed to the Action setup.
Action
This Zap doesn’t need an additional step, only a Trigger and an Action. Everything you'll need will be imported from your worksheet, provided that the sheet contains the necessary data.
1. Select the ‘Edda’ app.2. In the App & Events section, choose ‘Create a company event’.
3. Now, let's add some additional information about the event you wish to create as shown below. The little red markers will indicate which fields are mandatory to fill out, and which ones you can leave empty if you wish:
.png?width=670&height=429&name=image%20(13).png)
4. Then, once the test has been successful, you can publish the Zap.
.png?width=670&height=433&name=image%20(14).png)
Depending on your objective, you can set it to create a company in Edda every time a new row is added or do a one-time sync to import all data from the file.
Troubleshooting
‘Possible Zap loop detected’ warning
You may encounter this warning in one of your Zap steps if you’re using the same app for your Trigger and for your Action. It serves only to warn you of potential redundancy, but you can ignore it and complete your Zap regardless.
This setup, however, may cause an overcharge in your Zapier plan. If you choose to add multiple steps to your Zap that aren’t needed, for example they’re all fetching the same data, then it would be best to rethink your Zap and remove any redundant steps.
See Zapier’s guide on the matter here..png?width=398&height=110&name=image%20(15).png)
‘Failed to create a [xyz] in Edda’ error
This error indicates an issue with a specific endpoint on our end. It is a bug that should be reported to our Engineering team, so please feel free to reach out to us using the chat option in your Edda workspace..png?width=395&height=149&name=image%20(16).png)
‘Failed to find a [xyz] object in Edda’ error
This error commonly indicates that the object this step was trying to fetch either doesn’t exist for the selected parameters, or the parameters haven’t been set up correctly.
If there is any additional information on this topic that you need, please don't hesitate to reach out to our Support Team via the chat in your Edda workspace.